
Quick start
The fastest and recommended way to self-host TypeType is the install script. It sets up the whole stack for you, secrets, free ports, services, and the object store for downloads, so you get a complete, working instance in one command.
Prefer doing it by hand?
Everything the script does is also documented step by step in Manual setup, if you want full control or to understand each part.
One command
curl -fsSL https://raw.githubusercontent.com/TypeType-Video/TypeType/main/scripts/install-stack.sh | bashThe installer:
- creates
~/typetype-stackwith the Compose file and stack scripts, - generates the downloader, Garage RPC, and YouTube session secrets,
- picks free ports automatically when the defaults are taken,
- validates the resolved configuration and starts every service,
- and bootstraps Garage, so downloads work out of the box.
It is interactive. It downloads and prepares the stack files first, then asks for confirmation before pulling images and starting containers.
On an update, the installer first creates a timestamped backup of the managed stack files and records the current image references. It then waits for the refreshed services and verifies their version endpoints before finishing.
Choose the directory
The installer puts the stack in ~/typetype-stack. That is only its default: pass --dir to install anywhere you like.
curl -fsSL https://raw.githubusercontent.com/TypeType-Video/TypeType/main/scripts/install-stack.sh | bash -s -- --dir /srv/typetypeThe commands of this documentation use $STACK_DIR for that directory. Set it once in your terminal, to the default or to the directory you chose:
STACK_DIR=~/typetype-stackA manual installation has no default: $STACK_DIR is the directory that contains your docker-compose.yml.
Download only
To fetch the files and review them before starting Docker yourself:
curl -fsSL https://raw.githubusercontent.com/TypeType-Video/TypeType/main/scripts/install-stack.sh | bash -s -- --download-onlyCheck it is up
cd "$STACK_DIR"
docker compose ps
docker compose exec -T typetype-server wget -qO- http://127.0.0.1:8080/health
The second command checks Server from inside its container, so it remains correct when the installer selects a different host port.
Create the admin account
Open the web app (the installer prints the exact URL, http://localhost:8082 by default). On a fresh install it asks you to create an account, and the first account becomes the administrator automatically.
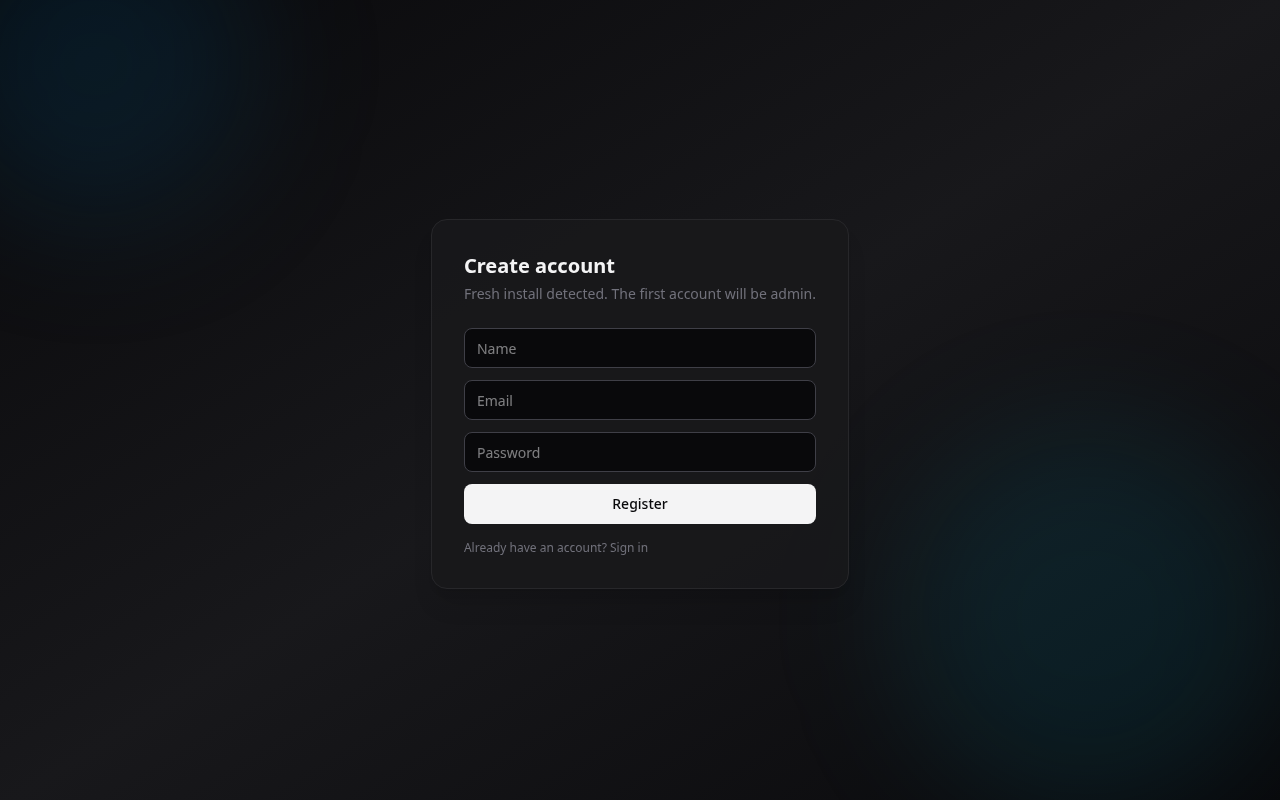
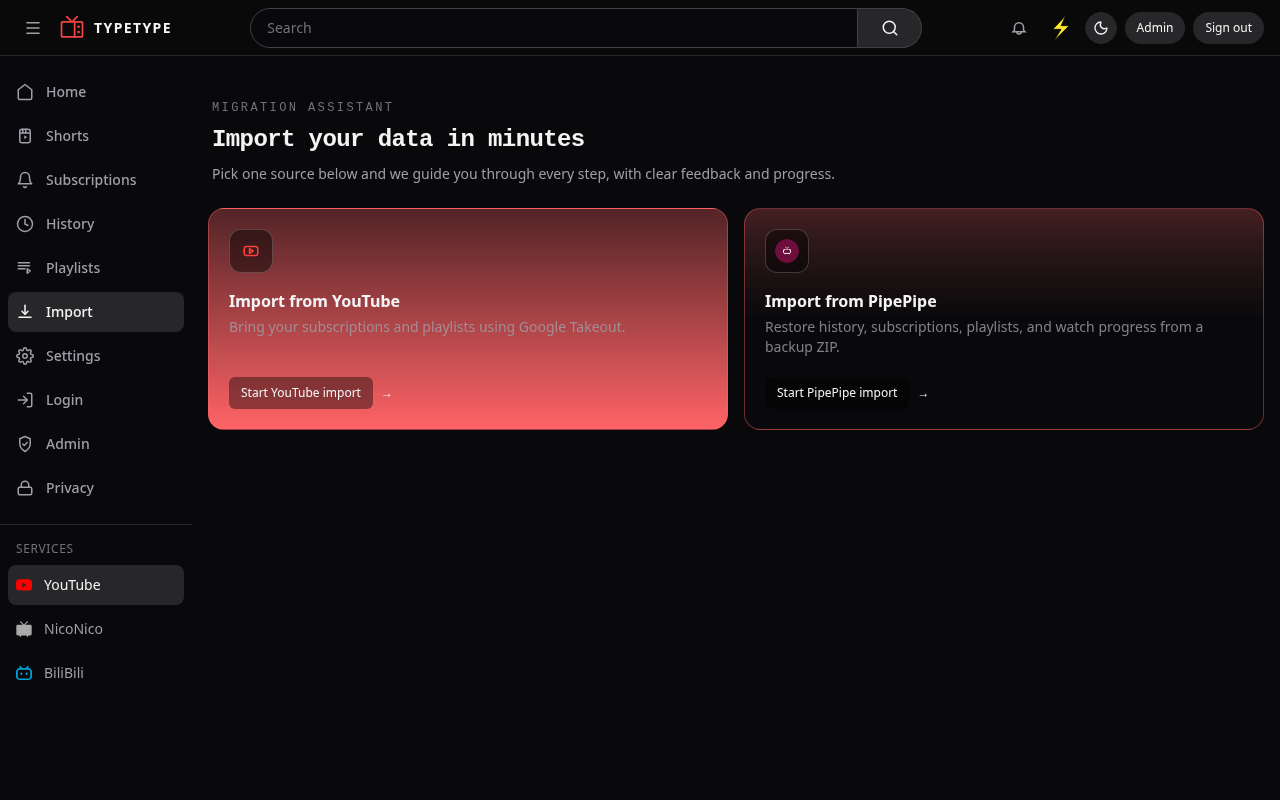
Enter a name, email, and password, then Register. You are signed in as the admin and land on the onboarding screen, where you can import your data.
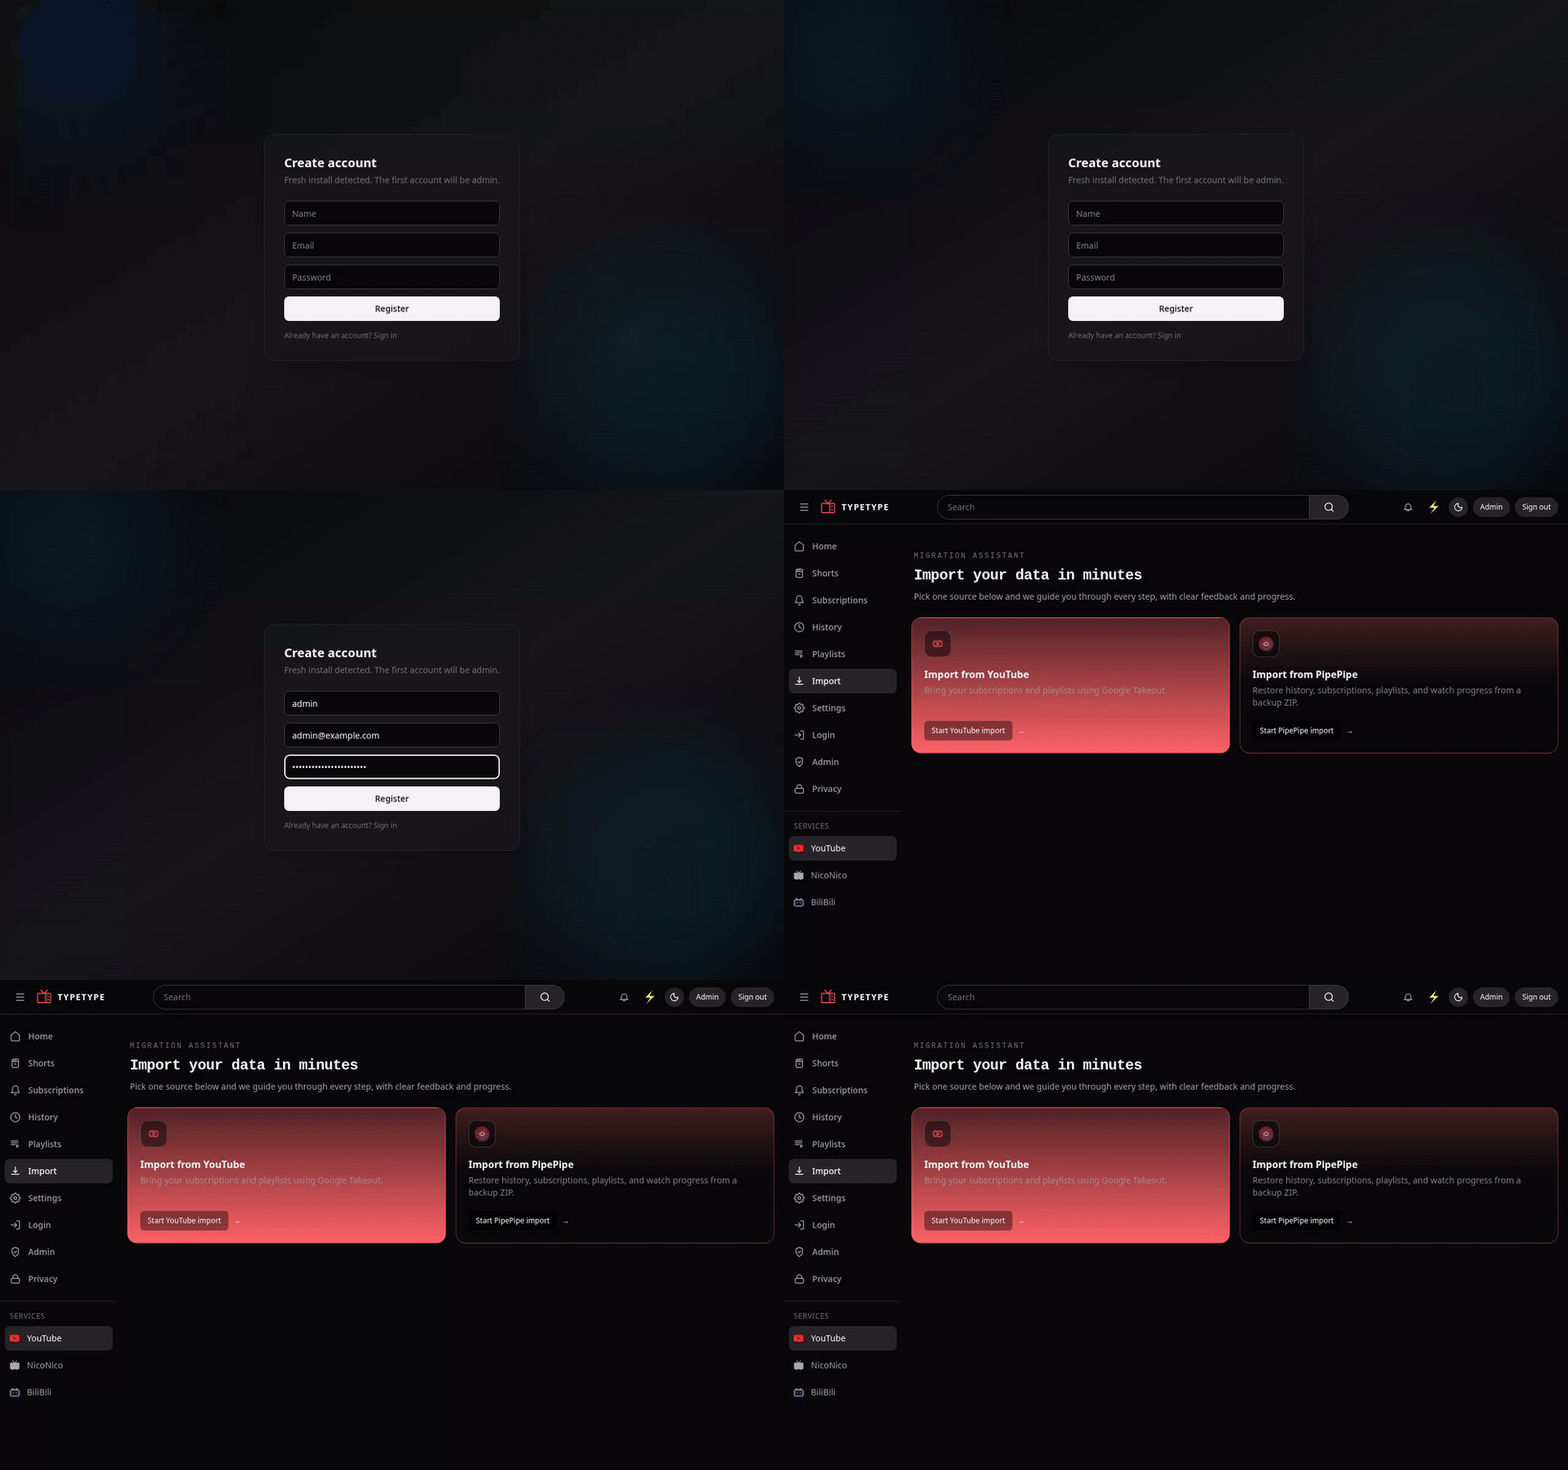
The whole flow:
Next
- Put it on your own domain with HTTPS, Reverse proxy and HTTPS.
- Tune ports, database, and secrets, Configuration.
- Keep it healthy, Maintenance.