
Manual setup
This page gets TypeType running on your own machine by hand, with Docker Compose. The base setup is a short sequence of commands. Everything the helper scripts in the repo do is explained here, so you never have to run a script you do not understand.
The stack creates the sensitive YouTube keys during its one-time bootstrap. A script-free install must generate the Garage RPC secret itself, as shown below.
Recommended: the install script
For most people the Quick start script is the easiest path, it does everything on this page for you, including the object store for downloads. Use this manual guide if you want full control or to understand each step.
Part 1 - Get it running
1. Download the files
The Compose file, .env.example, and stack scripts live in the TypeType repository. The web image already includes the supported nginx configuration, and Compose creates Garage's default configuration in a named volume. The stack pulls prebuilt images, so there is nothing to compile.
git clone https://github.com/TypeType-Video/TypeType.git
cd TypeType
2. Create your configuration
Copy the example file. Most defaults already work for a local install; replace the Garage placeholder in the next command before starting the services.
cp .env.example .envGenerate a unique 32-byte hexadecimal Garage RPC secret and replace its placeholder:
GARAGE_RPC_SECRET=$(openssl rand -hex 32)
sed -i "s/^GARAGE_RPC_SECRET=.*/GARAGE_RPC_SECRET=$GARAGE_RPC_SECRET/" .env
This value authenticates Garage's internal cluster protocol. The supported installer generates it automatically; the requirement was identified through arcoast's Garage investigation.
The two YouTube placeholders are automatic
YOUTUBE_REMOTE_LOGIN_INTERNAL_TOKEN and YOUTUBE_SESSION_ENCRYPTION_KEY are filled in for you on first start. An init container generates them and Server reads them from a private volume. Leave those two SET_ME_... values unchanged unless you manage the secrets yourself.
3. Bootstrap and start everything
./scripts/run-stack-init.sh
docker compose up -d --remove-orphans --wait --wait-timeout 180
The bootstrap runs one short-lived typetype-init task and removes it after a successful run. It prepares the private secrets volume, Garage configuration, and Downloader database before the long-running services start.
Check that the long-running services are up:
docker compose ps -aYou should see typetype, typetype-server, typetype-token, typetype-downloader, postgres, dragonfly, and garage all running or healthy. The initializer was run with --rm, so it is expected not to appear in the list after a successful bootstrap.
4. Open it and create the admin account
Visit http://localhost:8082. On a fresh install the app detects that no account exists yet and asks you to create one. The first account becomes the administrator automatically, no extra step.
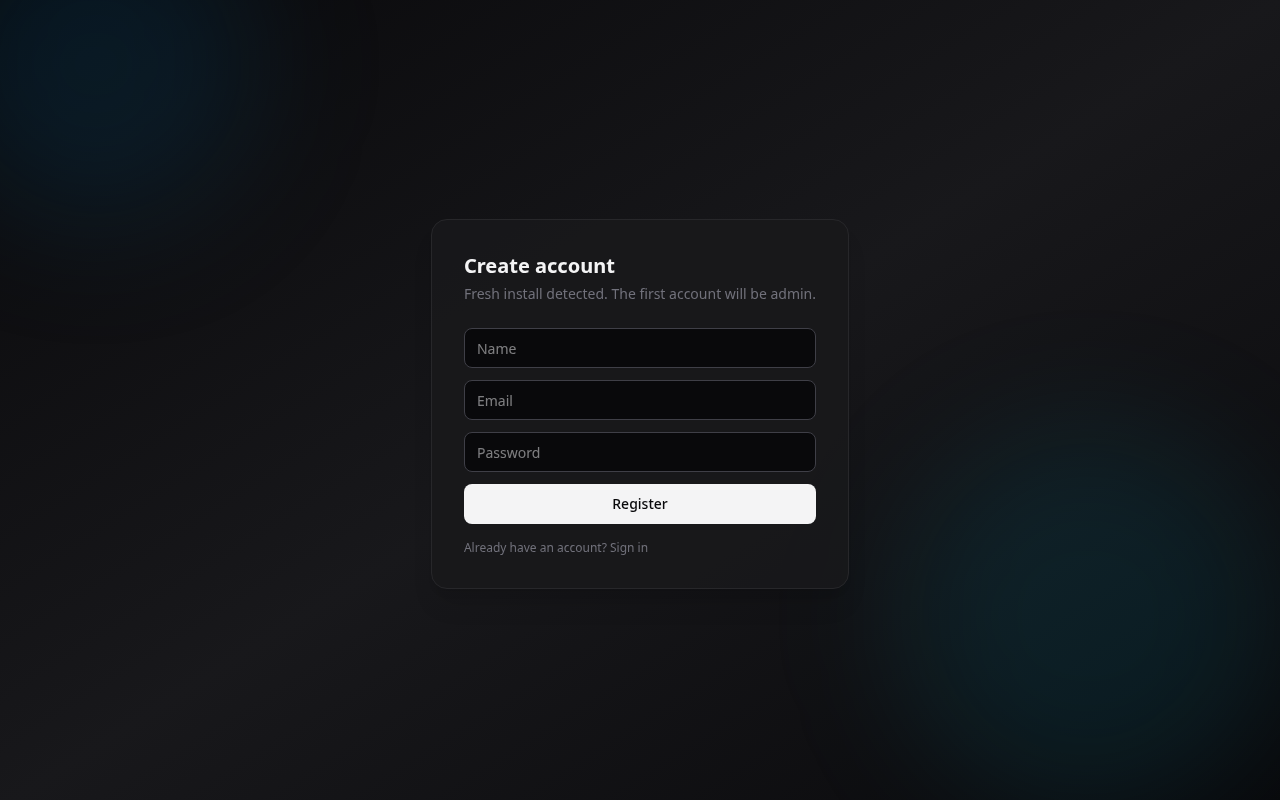
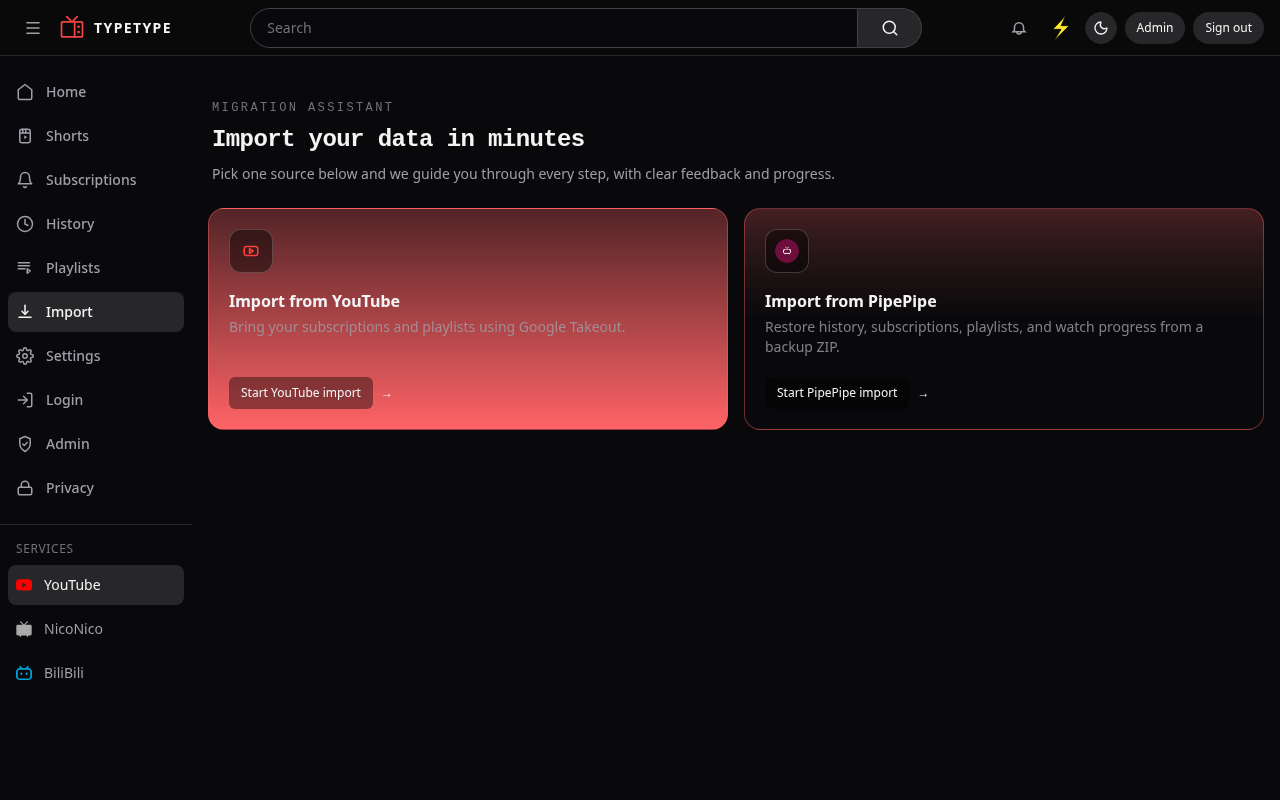
Enter a name, email, and password, then Register. You are immediately signed in as the admin and land on the onboarding screen, where you can import your data.
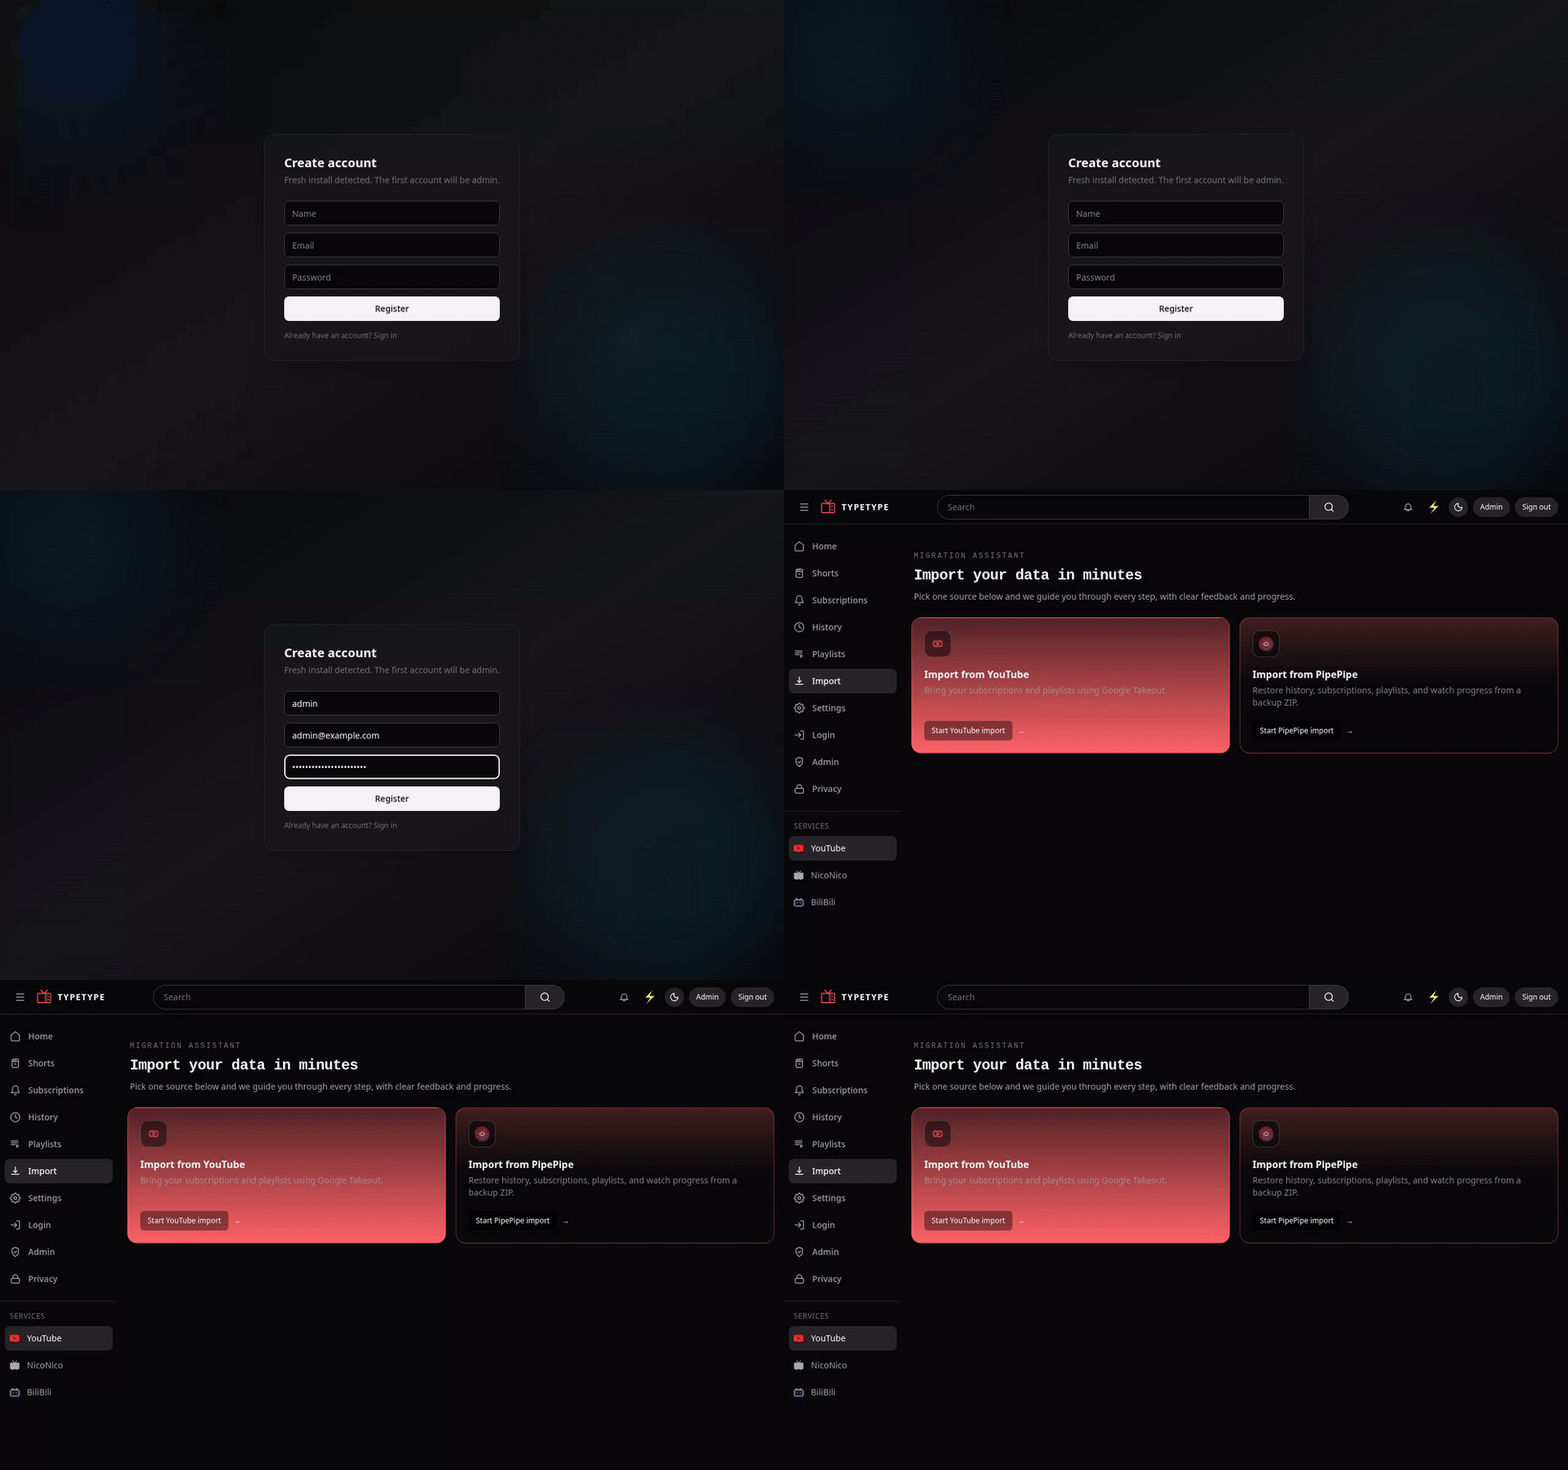
The whole flow from the empty form to the admin home:
That is the entire base install. To put it on a real domain with HTTPS, see Reverse proxy and HTTPS.
Part 2 - Object storage for downloads
The download feature needs an S3-compatible object store, which the stack already includes (Garage). The install script sets this up automatically; the manual steps are below. Browsing and watching already work, so you can do this now or later, but downloads stay disabled until it is done.
1. Generate an access key and secret
The access key must start with GK.
echo "DOWNLOADER_S3_ACCESS_KEY=GK$(openssl rand -hex 12)"
echo "DOWNLOADER_S3_SECRET_KEY=$(openssl rand -hex 32)"
Paste both lines into .env, replacing the SET_ME_ACCESS_KEY and SET_ME_SECRET_KEY placeholders, then recreate the affected services:
docker compose up -d2. Provision Garage
Run these once. They assign storage, create the bucket, register your key, and grant it access. Garage reads the initialized configuration through GARAGE_CONFIG_FILE, so the CLI automatically uses it.
# short alias for the Garage CLI inside the container
g() { docker compose exec -T garage /garage "$@"; }

# 1. give the node a storage layout
NODE_ID=$(g node id | head -n1 | cut -d@ -f1)
g layout assign -z dc1 -c 20GB "$NODE_ID"
g layout apply --version 1

# 2. create the downloads bucket
g bucket create typetype-downloads

# 3. register the key from step 1 (use YOUR values from .env)
g key import --yes -n typetype-downloader "<DOWNLOADER_S3_ACCESS_KEY>" "<DOWNLOADER_S3_SECRET_KEY>"

# 4. let that key use the bucket
g bucket allow --read --write --owner --key "<DOWNLOADER_S3_ACCESS_KEY>" typetype-downloads
TIP
--version 1 is correct on a fresh install. If you re-run the layout step later, use one more than the version shown by g layout show.
Downloads now work from the interface.
The browser downloads through the Server gateway. Garage remains internal; you do not need to expose port 3900 publicly or configure a browser-facing S3 endpoint.
Part 3 - Deploy with Dockge
Credit
This section is adapted from @BuggyPasta's writeup, who worked through the whole flow end-to-end on a real Dockge install and published it in the follow-up to issue #254 and discussion #277. Thank you.
Dockge is a web interface for Docker Compose. It can manage the TypeType stack alongside your other stacks, but it does not replace TypeType's one-time bootstrap. Keep the official service names and files so the internal URLs and Garage commands continue to match the supported stack.
1. Prepare the stack directory
Use the host directory that is mounted as Dockge's stacks directory. The example below creates a typetype stack under $HOME/dockge-stacks; choose another path if your Dockge installation uses a different one.
mkdir -p "$HOME/dockge-stacks"
git clone --depth 1 https://github.com/TypeType-Video/TypeType.git \
  "$HOME/dockge-stacks/typetype"
cd "$HOME/dockge-stacks/typetype"
cp .env.example .env
mkdir -p .typetype-migration
Generate the Garage secret before deploying. Keep the value in .env; never paste it into a public issue or a Dockge screenshot.
GARAGE_RPC_SECRET=$(openssl rand -hex 32)
sed -i "s/^GARAGE_RPC_SECRET=.*/GARAGE_RPC_SECRET=$GARAGE_RPC_SECRET/" .env
Refresh Dockge and select the typetype stack. Edit .env from Dockge or from the stack directory, and set ALLOWED_ORIGINS to the exact origin users will open. Do not paste the older community Compose examples over the current file; the supported Compose file already contains the current typetype-init flow.
2. Run the one-time bootstrap
Run this once from the stack directory, before starting the application services:
./scripts/run-stack-init.shThe command runs typetype-init with --rm. It generates the YouTube session secrets, creates Garage's configuration, and creates the Downloader database. It is safe to run again when updating the stack; existing secrets and Garage configuration are preserved.
3. Start and manage the stack in Dockge
After the bootstrap exits successfully, use Dockge's Deploy or Start action. The equivalent host command is:
docker compose up -d --remove-orphans --wait --wait-timeout 180Check the stack from Dockge or with docker compose ps. The bootstrap container is removed after success, so it does not need to remain running. Keep the PostgreSQL, Garage, and secrets volumes when stopping or updating the stack; never use docker compose down -v for a normal update.
4. Update the stack without losing anything
Use Dockge's Update action, which pulls the new images and restarts the containers, then run System Prune to reclaim disk space from the old image layers.
Never prune while the stack is stopped
Garage's layout and bucket registration live in the same named volumes described in Part 2, which prune does not remove. But if you ever prune while the stack is stopped, the safe recovery is simply to re-run the Garage provisioning steps from Part 2, it takes a few seconds and does not touch your accounts, history, or settings.
The Garage node ID is not stable
If you ever wipe Garage's metadata volume entirely (not a normal update), its node ID changes and you must re-run the layout assignment in Part 2 with the newly generated ID, not one from a previous run.
Custom nginx or Garage configuration
The supported defaults do not require host configuration files. To customize either service, keep the custom files outside the managed stack files and mount them with a docker-compose.override.yml:
services:
  typetype:
    volumes:
      - ./config/nginx.conf:/etc/nginx/conf.d/default.conf:ro
  garage:
    volumes:
      - ./config/garage.toml:/etc/garage/garage.toml:ro
Create config/nginx.conf or config/garage.toml only when the default topology does not fit the deployment. Compose loads the override automatically. Validate the resolved mounts before starting:
docker compose config -q
docker compose config
The installer preserves docker-compose.override.yml and files that are not part of the managed stack. Keep those files in backups with .env.
Everyday commands
docker compose pull && docker compose up -d   # update to the latest version
docker compose logs -f typetype-server        # follow the server logs
docker compose down                           # stop (your data is kept)